

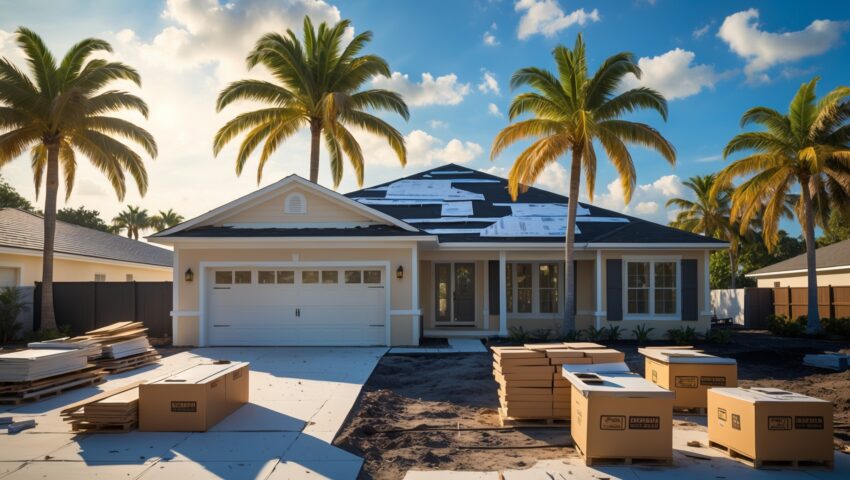
Introduction: Unlocking Renovation Potential After a Legal Settlement
Receiving a legal settlement after a property damage claim, insurance dispute, or construction defect case can be a turning point for Florida homeowners. With Florida’s unique climate challenges and stringent building codes, using settlement funds effectively for home renovations is not only an opportunity, but also a responsibility. Mismanaging these funds—whether through poor budgeting, non-compliance with local regulations, or missing out on insurance benefits—can lead to costly mistakes or even legal trouble. This comprehensive guide walks you through the exact steps, best practices, and compliance essentials to maximize your legal settlement funds for home upgrades, repairs, or restorations in Florida. We’ll cover everything from understanding settlement terms, budgeting for specific upgrades, working with contractors, and ensuring ongoing compliance, all illustrated with practical examples and case studies. Whether your settlement is the result of hurricane damage, faulty workmanship, or another legal dispute, this guide will help you transform those funds into lasting home improvements that increase your property’s value and resilience.
Understanding Your Legal Settlement: Key Terms and Restrictions
Types of Settlements Common in Florida Home Disputes
- Insurance Settlements: Payouts for hurricane, flood, fire, or water damage claims.
- Construction Defect Settlements: Compensation for faulty materials or workmanship.
- HOA or Builder Disputes: Resolutions involving common area repairs or developer negligence.
Typical Settlement Structures
- Lump Sum Payments: Receive full amount upfront. Easier for planning large projects.
- Structured Payments: Funds released in stages, often tied to repair milestones.
- Escrow Arrangements: Third-party holds funds, releasing payments as work completes and passes inspection.
Common Restrictions and Obligations
- Funds may be earmarked for specific repairs or upgrades (e.g., roof replacement, mold remediation).
- Insurers or courts may require proof of completed work (invoices, inspection reports).
- Unspent funds might need to be returned or could reduce future policy payouts.
- Time limits: Many settlements require all work to be completed within 6–24 months.
Step 1: Verifying and Accessing Your Settlement Funds
Review the Settlement Agreement
Carefully read your settlement documents. Look for:
- Approved uses for funds
- Required documentation for reimbursement or payment release
- Deadlines for starting or finishing work
- Any co-payee requirements (e.g., mortgage lender endorsement on checks)
Engage Your Mortgage Lender (If Applicable)
If you have a mortgage, lenders are often named as co-payees to protect their interest. Steps to follow:
- Notify your lender of the settlement and planned renovations
- Submit required paperwork (settlement statement, contractor estimates, scope of work)
- Understand the lender’s inspection/release process for disbursing funds
Setting Up Escrow Accounts
For structured settlements or large projects, an escrow account ensures funds are used as intended. Your attorney, insurer, or lender can help establish this with clear disbursement criteria.
Step 2: Creating a Realistic Renovation Budget
Break Down Settlement Allocations
- Direct Repair Costs: Labor, materials, permits, and inspections for required work
- Preventative Upgrades: Storm-hardening, water mitigation, or code upgrades allowed by your settlement
- Professional Fees: Contractors, architects, engineers, and legal/escrow costs
- Contingency Fund: Reserve 10–15% for unforeseen issues (hidden damage, code changes, delays)
Sample Cost Breakdown for a $75,000 Settlement
- Roof replacement: $30,000
- Water damage remediation: $15,000
- Electrical upgrades: $8,000
- Permit and inspection fees: $2,500
- Project management/legal fees: $5,000
- Contingency: $7,500
- Optional energy upgrades (if permitted): $7,000
Get Multiple Estimates
Obtain at least three detailed quotes from licensed Florida contractors for each major scope item. Make sure each estimate:
- Includes labor, materials, and permit costs
- Specifies timelines and payment milestones
- Reflects current Florida code and storm-resilient options
Step 3: Navigating Permits and Compliance
Identify Required Permits
- Major repairs (roof, electrical, structural) almost always require permits in Florida.
- Check your municipality’s portal or consult your contractor for a permit checklist.
Document Everything
Keep digital and hard copies of:
- Permits and inspection reports
- Before-and-after photos
- Invoices and proof of payment
- Correspondence with contractors and lenders
Meet All Code and Settlement Requirements
- Florida Building Code compliance is non-negotiable—inspections must pass before final payments or future insurance coverage.
- Your settlement may also require upgrades to meet wind, flood, or fire resistance standards.
Step 4: Selecting and Managing Contractors
Vetting Licensed Professionals
- Verify state licensing through the Florida Department of Business & Professional Regulation (DBPR)
- Check for insurance (liability and workers’ comp)
- Review reputation via the Better Business Bureau and local references
- Avoid cash payments—always use traceable methods
Setting Clear Contracts
- Scope of work, timeline, and payment schedule
- Change order process for any deviations
- Warranties on materials and labor
- Cleanup and debris removal responsibilities
Payment Triggers
- Never pay more than 10% upfront or $1,000 (whichever is less) as per Florida Statute 489.126
- Release progress payments only after work passes each inspection phase
- Hold final payment until receipt of final inspection approval and release of liens
Step 5: Insurance and Future Claims Considerations
Notify Your Insurer
- Report planned upgrades, especially those improving storm resistance or reducing risk (could lower your premium)
- Submit documentation of all completed repairs/upgrades
Avoiding Double Recovery
You cannot claim for the same damage twice. If you receive a settlement for a new roof, you must use those funds for that purpose, or risk denial of future claims and potential legal action.
Maintaining Documentation for the Future
- Store all project files securely (cloud and hard copy)
- Use this documentation for insurance renewals, future claims, or property sales
Case Study: Hurricane Ian Settlement to Full Home Upgrade
Background: The Martinez family in Fort Myers received a $110,000 insurance settlement after Hurricane Ian caused roof and interior water damage. Their mortgage lender was a co-payee.
Step-by-step process:
- Worked with a public adjuster to clarify settlement terms—funds earmarked for roof, drywall, and mold remediation
- Submitted contractor bids to lender; set up escrow with staged disbursements after each completed phase
- Reserved $10,000 for storm-resistant upgrades (Class 4 shingles, impact-rated attic vents) after confirming with insurer these would not void settlement terms
- Secured permits for all phases; passed each municipal inspection
- Documented all work and submitted to insurance for future discount on windstorm premium
- Project completed on time; remaining funds were used to upgrade attic insulation per code
Lessons learned: Clear communication with lender and insurer, strict adherence to permitted uses, and meticulous documentation were key to maximizing both the value and compliance of the renovations.
Common Pitfalls and How to Avoid Them
- Misallocating funds: Spending settlement money on unrelated improvements can violate agreement terms or jeopardize future claims.
- Poor documentation: Failing to keep receipts, permits, or inspection reports can result in denied reimbursements.
- Unlicensed contractors: Hiring unlicensed workers to save money often leads to code violations, shoddy work, or insurance denial.
- Permit shortcuts: Skipping permits to save time can lead to stop-work orders, fines, or even forced removal of upgrades.
- Ignoring deadlines: Many settlements have strict timeframes—missing them can mean forfeiting funds or facing legal consequences.
Maintenance and Future-Proofing After Renovations
Documenting Ongoing Maintenance
- Keep logs of roof inspections, HVAC servicing, and any warranty repairs
- Register new products (windows, roofing, appliances) for manufacturer warranties
Planning for Resale or Re-Financing
- Well-documented, code-compliant upgrades add value and ease buyer concerns
- Provide future buyers with a renovation binder containing permits, receipts, and photos
Setting Up a Preventative Maintenance Fund
- Allocate a portion of your settlement or future savings for annual upkeep and storm prep
- Schedule seasonal inspections to catch minor issues before they become major repairs
Conclusion: Turning Settlement Challenges into Lasting Home Value
Managing legal settlement funds for home renovations in Florida is a unique opportunity that comes with its own set of challenges and rewards. From clarifying the fine print of your settlement to budgeting wisely, securing the right permits, and documenting every phase, each step protects both your investment and your peace of mind. By working with licensed professionals, maintaining open communication with your lender and insurer, and adhering to all compliance requirements, you not only avoid costly pitfalls but also set your home up for lasting safety, comfort, and value. Real-life cases show that homeowners who treat settlement funds as a structured investment—rather than a windfall—end up with resilient, market-ready properties and fewer headaches down the road. Whether you’re recovering from storm damage, resolving a construction dispute, or simply upgrading for the future, a disciplined approach ensures your settlement transforms into the home improvements your family truly needs. Remember, every dollar spent according to Florida regulations and best practices is a step toward a safer, more valuable property—and peace of mind for years to come.
If my settlement is being paid out in structured payments tied to repair milestones, how do I handle budgeting if I run into unexpected expenses before the next installment is released?
When your settlement is paid in installments based on repair milestones, it’s wise to set aside a contingency fund from your first payments, if possible, to cover unexpected costs. If you encounter expenses before your next payment, communicate with your claims adjuster or settlement administrator to see if any flexibility exists for early or partial releases. Also, discuss with your contractor about prioritizing critical repairs or negotiating payment schedules to help bridge the gap until the next installment.