

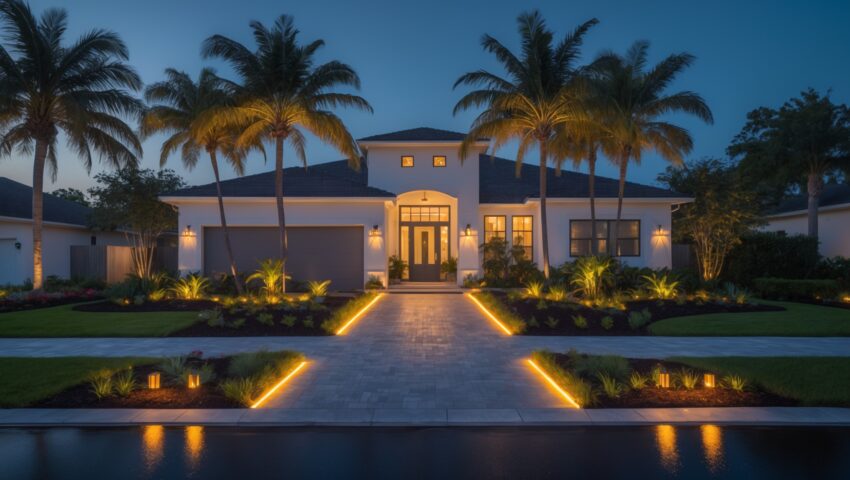
Introduction: Why Outdoor Lighting Upgrades Matter in Florida
Outdoor lighting plays a crucial role in Florida homes—not only for curb appeal but also for safety, security, and storm resilience. With year-round warm weather, homeowners spend more time outdoors, making patios, walkways, and gardens extensions of living space. However, Florida’s unique climate, local ordinances, and frequent storms demand that any exterior lighting upgrade go beyond mere aesthetics. Mistakes in compliance, permitting, or installation can lead to city fines, insurance issues, or even fire hazards. This comprehensive guide provides Florida homeowners with a step-by-step compliance and safety checklist for upgrading outdoor lighting systems, covering practical permit tips, code essentials, hurricane readiness, and maintenance best practices. Whether you’re planning to install pathway lights, enhance security with motion sensors, or add ambiance to your backyard, following this checklist ensures your upgrade is legal, safe, and built to last through Florida’s toughest weather.
Understanding Florida Regulations for Outdoor Lighting
Local Ordinances and HOA Rules
Before purchasing a single fixture, research your city or county’s outdoor lighting codes. Many Florida municipalities—such as Miami, Orlando, or Tampa—enforce strict rules on fixture placement, brightness, and light direction to minimize light pollution and protect sea turtles and wildlife. Additionally, Homeowners Associations (HOAs) may have their own requirements or restrictions on fixture style, color temperature, or allowed hours of operation.
- Check city and county websites for outdoor lighting codes.
- Contact your HOA for written guidelines.
- Document all requirements before planning your upgrade.
Florida Building Code and Electrical Standards
Florida’s Building Code (7th Edition, as of 2024) outlines electrical safety standards for outdoor installations. All exterior lighting circuits must be protected by Ground Fault Circuit Interrupters (GFCIs), and wiring must be rated for wet locations. Non-compliance can invalidate your homeowner’s insurance and expose you to legal liability if an accident occurs.
- Use only UL-listed, outdoor-rated fixtures and cables.
- Ensure all outlets are GFCI-protected.
- Follow the National Electrical Code (NEC) as adopted by Florida.
Obtaining the Right Permits for Outdoor Lighting Projects
When Is a Permit Required?
Permit requirements vary by municipality, but in most Florida cities, a permit is needed if your upgrade involves:
- Installing new electrical wiring or circuits
- Adding new exterior outlets or junction boxes
- Hardwiring fixtures to the home’s main electrical panel
Low-voltage (12V) landscape lighting kits often do not require a permit if plugged into existing outdoor GFCI outlets, but always confirm with your local building department.
Steps to Secure a Permit
- Draft a site plan showing fixture locations and wiring paths.
- Complete the permit application (available online or at your local building office).
- Submit manufacturer specs for all fixtures and transformers.
- Pay the applicable permit fee (range: $50–$200, depending on project size).
- Schedule required inspections (pre- and post-installation).
Tip: DIYers must check if their municipality allows homeowners to pull permits or if a licensed electrician is required.
Choosing the Right Outdoor Lighting for Florida Homes
Weather-Resistant and Hurricane-Ready Fixtures
Florida’s climate is tough on outdoor fixtures. Salt air, humidity, and hurricane-force winds can corrode or damage poorly chosen lights. Prioritize:
- Fixtures with corrosion-resistant housings (marine-grade stainless steel, brass, or powder-coated aluminum)
- IP65+ weatherproof ratings for wall and path lights
- Impact-rated glass or polycarbonate lenses
- Fixtures rated for wind uplift loads if mounted on posts or walls
Energy Efficiency and Dark Sky Compliance
LED lighting is now the standard, offering energy savings and long lamp life. For Florida homes near beaches or wildlife areas, choose fixtures with downward-facing shields and warm color temperatures (<3000K) to minimize light pollution and protect sea turtles.
- Look for “Dark Sky” compliant fixtures
- Install timers, photocells, or smart controls to limit unnecessary operation
Outdoor Lighting Safety Checklist
1. Pre-Installation
- Call 811 to locate underground utilities before digging.
- Map out fixture placement, ensuring lights don’t shine into neighbors’ windows or into the street.
- Choose locations above flood-prone zones and away from sprinkler heads.
2. Electrical Safety
- Turn off power at the breaker before any wiring work.
- Use only outdoor-rated junction boxes and connectors.
- Seal all connections with waterproof gel or heat-shrink tubing.
- Maintain minimum burial depth for wires: 6″ for low-voltage, 18″ for line voltage (per NEC).
- Install GFCI protection on all exterior circuits.
3. Fixture Security and Storm Prep
- Secure fixtures with hurricane-rated anchors or mounting hardware.
- Position post lights and bollards away from flood zones, or use breakaway bases in flood-prone areas.
- Choose fixtures with quick-release features for easy removal before major storms.
4. Final Inspection and Testing
- Have all work inspected by a city official or licensed electrician if required.
- Test each fixture for proper operation, ground fault protection, and correct light direction.
- Document all work for insurance and future maintenance records.
Cost Breakdown: Budgeting for Outdoor Lighting Upgrades
Material Costs
- LED pathway or garden lights: $40–$100 per fixture
- Motion-activated security floodlights: $70–$150 each
- Low-voltage transformers: $80–$300
- Outdoor-rated wiring and connectors: $100–$300 (per 100 ft.)
- Smart lighting controls: $50–$200 per zone
Labor and Permit Fees
- Licensed electrician: $65–$120/hr, average total $500–$2,000 depending on complexity
- Permit fees: $50–$200
- Inspection fees: Often included in permit, but some cities charge $25–$100 per inspection
Hidden Costs to Watch For
- HOA review/approval fees
- Upgrading main electrical panel or outdoor outlets
- Post-storm fixture replacement if not hurricane-rated
- Landscaping repairs after trenching or fixture installation
Insurance and Liability Considerations
Notifying Your Insurer
After any electrical upgrade, notify your insurance provider. Some insurers offer discounts for upgrades that improve security (such as motion-sensor floodlights) or storm resilience. However, unpermitted or non-code-compliant work can void your policy in the event of a claim.
Documenting Compliance
- Keep all permits, inspection records, and receipts.
- Take photos before, during, and after installation.
- If hiring a contractor, verify their license and insurance—request a certificate of insurance (COI) before work begins.
Best Practices for Maintenance and Longevity
Routine Inspection Checklist
- Check for exposed wires, loose fixtures, or signs of corrosion every 6 months.
- Clean lenses and housings to maintain brightness and appearance.
- Test GFCI outlets monthly to ensure safety.
- After major storms, inspect for damage and water intrusion.
Upgrading Over Time
Technology evolves quickly. Plan for periodic upgrades to smart controls, more efficient LEDs, or fixtures with improved hurricane ratings. Document changes and update permits as needed to stay compliant.
Case Study: Code-Compliant Outdoor Lighting Upgrade in Naples, FL
In 2023, the Martinez family in Naples decided to upgrade their outdated outdoor lighting after a neighbor’s security incident. Working with a licensed electrician, they:
- Consulted city lighting codes and secured a $125 permit.
- Chose Dark Sky-compliant LED fixtures with integrated surge protection.
- Installed motion-activated floodlights near entry points and pathway lights along their driveway.
- Passed all city inspections and received an insurance premium reduction for improved security.
The total upgrade, including labor, fixtures, and permit fees, came to $2,850. The family avoided fines, impressed their HOA, and now enjoys safer, more beautiful evenings outdoors—plus peace of mind during storm season.
Conclusion: Upgrading Your Outdoor Lighting the Right Way
Outdoor lighting upgrades can transform your Florida home’s safety, security, and curb appeal—but only if done right. By following a thorough compliance and safety checklist, you minimize legal and insurance risks while increasing your home’s value and resilience. Always start by researching local codes and HOA restrictions, then secure the necessary permits before breaking ground. Choose weatherproof, hurricane-ready fixtures, and prioritize safe, code-compliant installation—whether DIY or by a licensed electrician. Don’t forget to notify your insurer and keep meticulous records for future claims or property sales. Ongoing maintenance is essential in Florida’s challenging climate: regular inspections, cleaning, and timely upgrades keep your systems functional and compliant, year after year. With careful planning and attention to detail, your outdoor lighting can provide lasting beauty, security, and peace of mind—no matter what Florida’s weather throws your way.
Ready to illuminate your Florida home? Use this checklist, consult local experts, and enjoy the benefits of a safer, smarter, and more inviting outdoor space.